To enable push notification service for the Safari browser you need a .P12 certificate. Here are the details to create and upload the certificate from your apple account. It will take you a few minutes to create.
Requirement
Below are the steps, you will need to perform.
Step 1: Make a request for a safari certificate
Step 2: Request from KeyChain Access
Step 3: Creating a Web Push Certificate
Step 4: Uploading the .p12 file(web push certificate) on Truepush
STEP 1
Make A Request For a Certificate
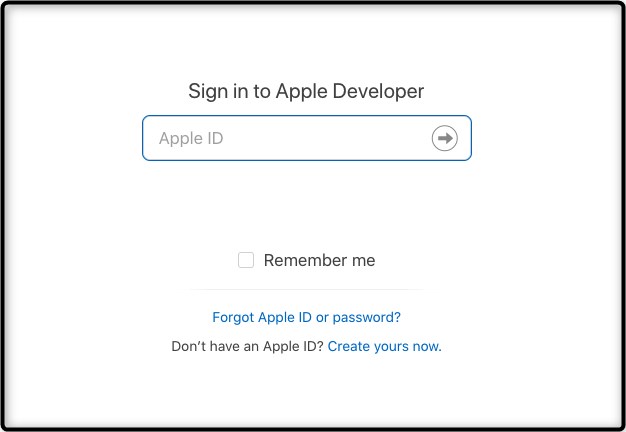
1.1 Go to https://developer.apple.com/account and login into the account.
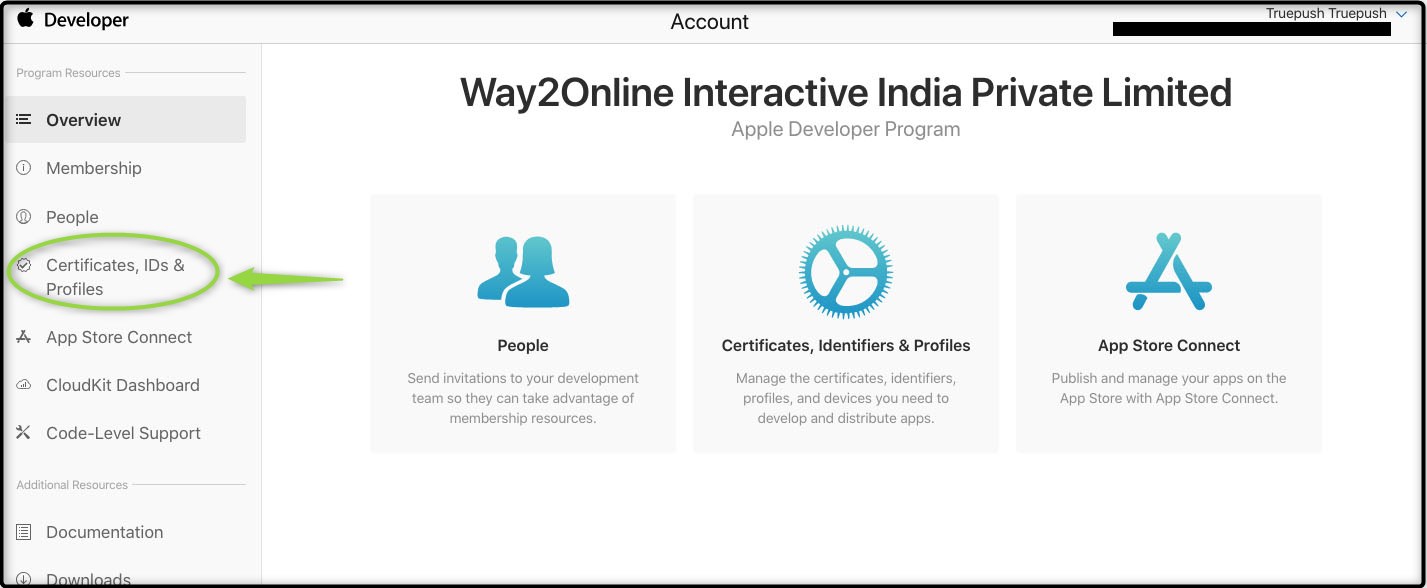
1.2 Once you are logged into your account, click on the “Certificates, ID & Profiles” tab.
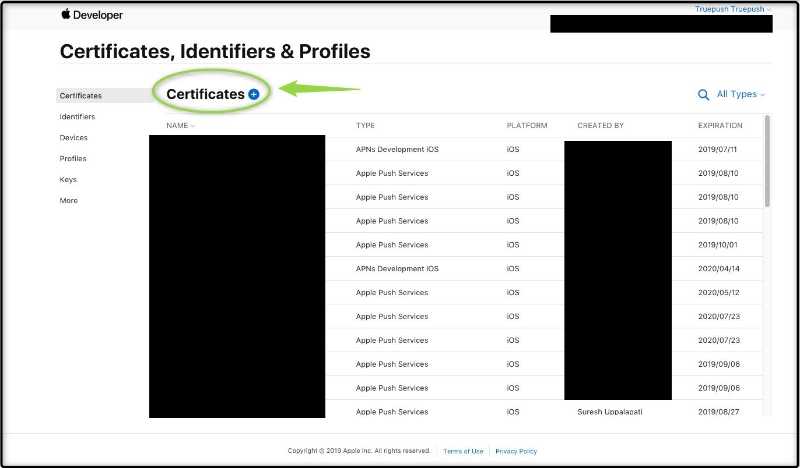
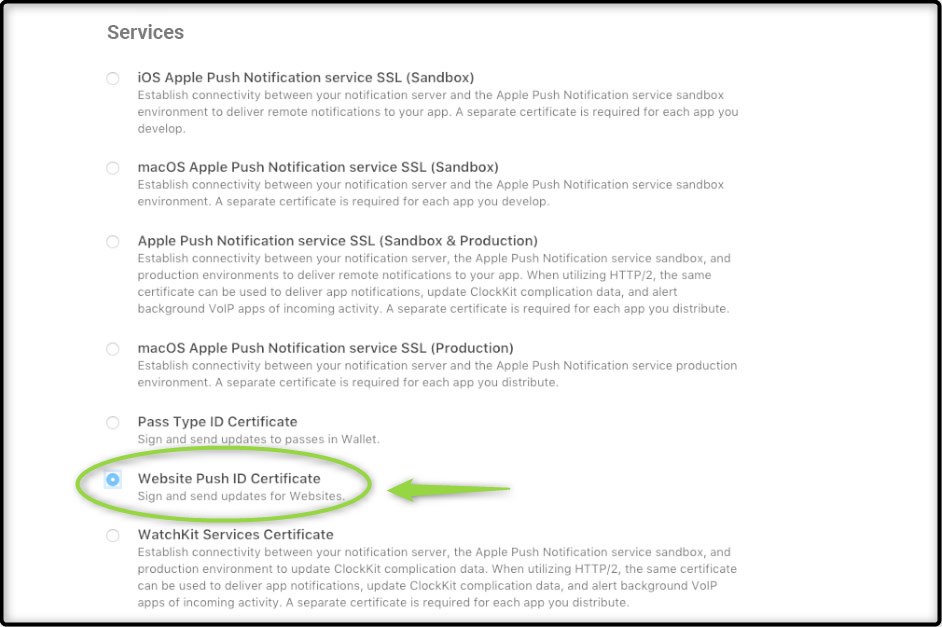
1.3 Click on the “Certificates +” icon.


Request From Keychain Access
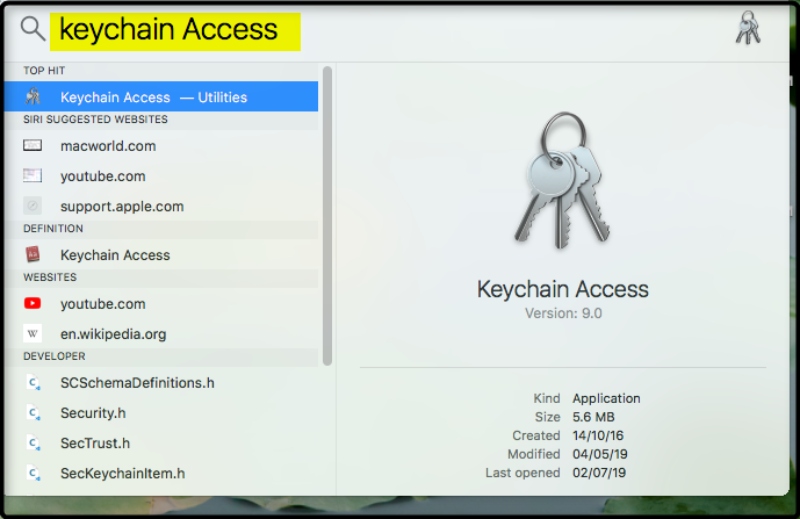
2.1 In your Mac system, open your “Keychain Access”.

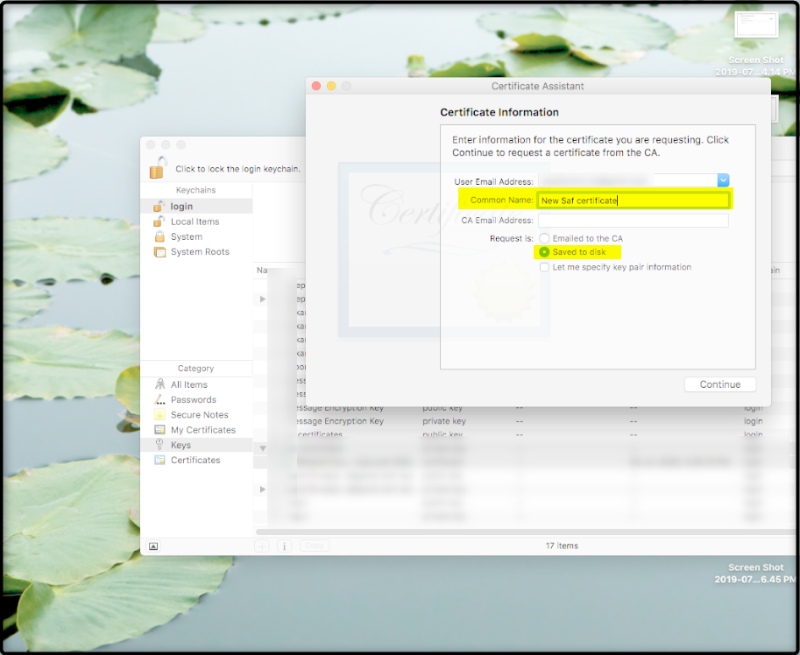
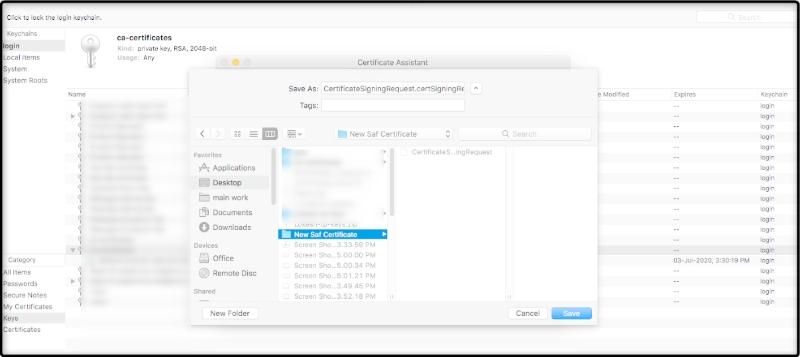
2.2 Give a common name(your certificate name) and select ‘Saved to disk”. Click on “Continue“.
Creating A Web Push Certificate
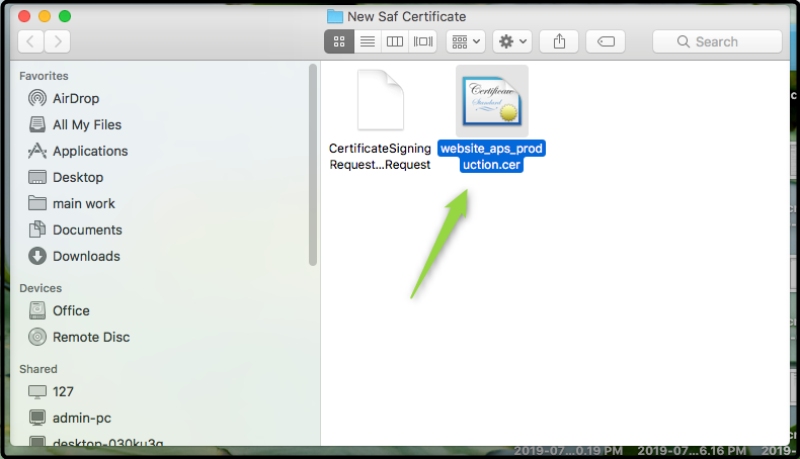
3.1 Come back to the “Create a New Certificate” page we left before in Step 1 and upload the certificate that you downloaded. Then, click on “Continue“.
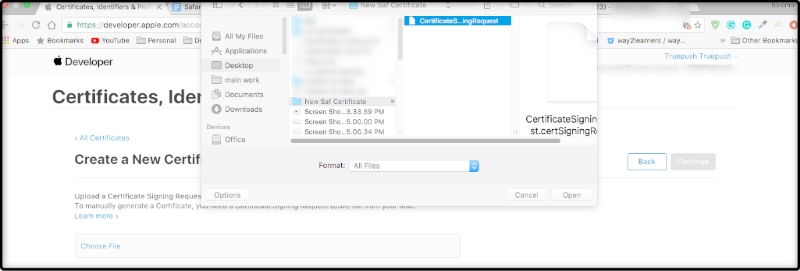
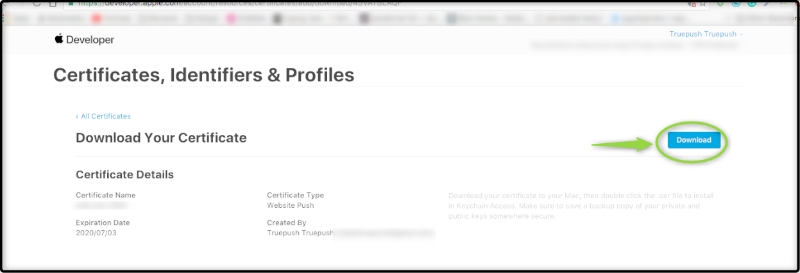
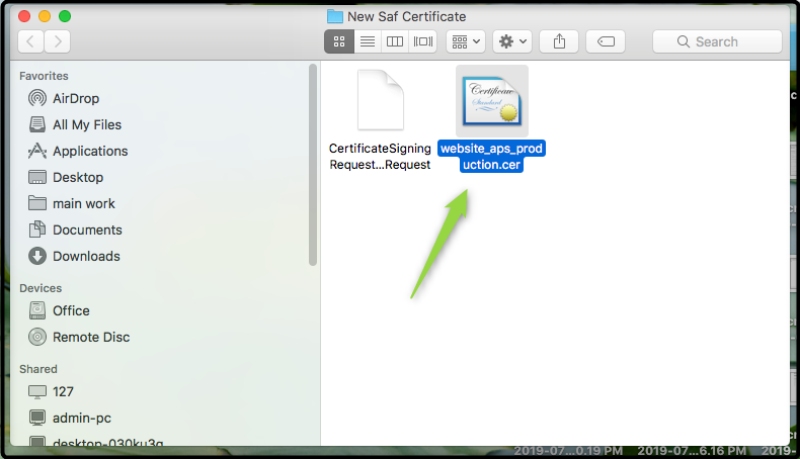
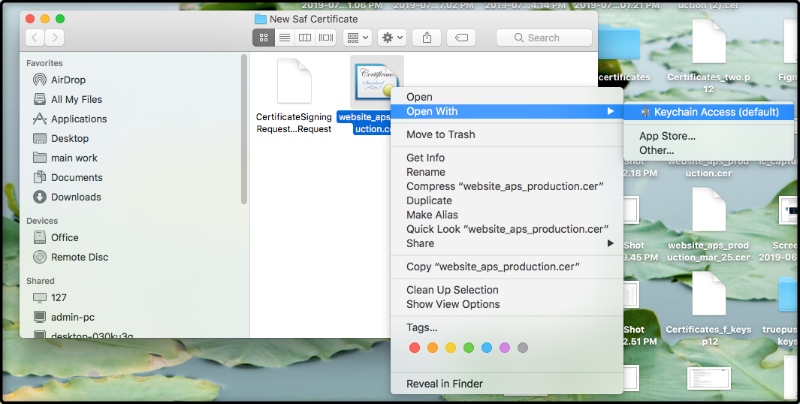
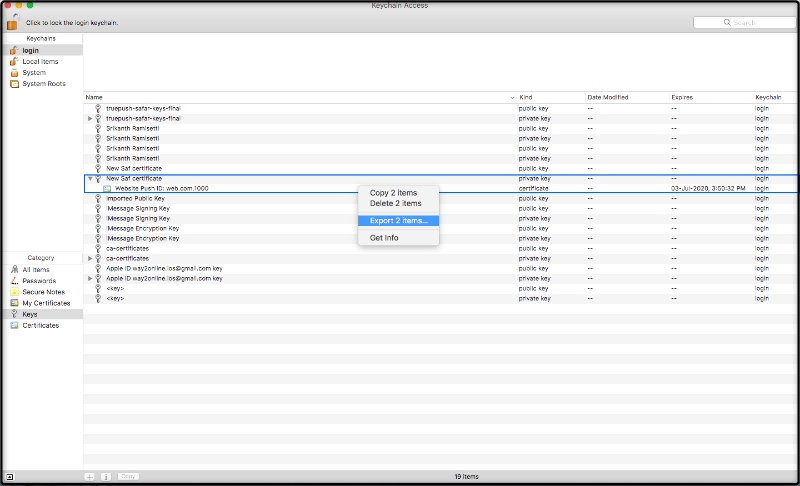
3.5 In KeyChain Access, you should be able to see your “created Private Key” and “Certificate paired”. Select both of them and right-click. You will see a screen as shared below. Click on Export 2 Items.
3.6 Select the folder like before and save your certificate. This is the .p12 certificate that you need to upload to the Truepush account.
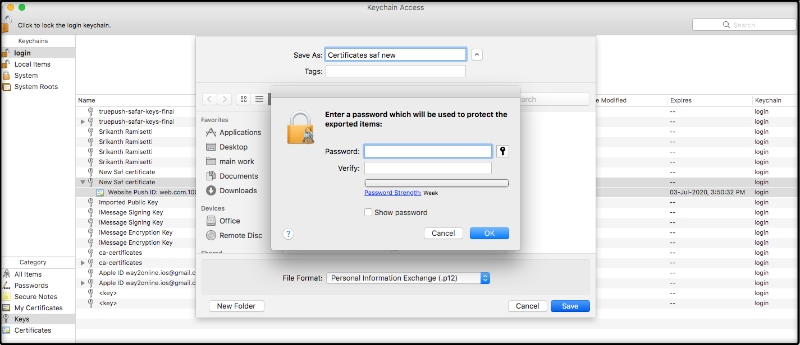
3.7 While saving, it will prompt you for a password to safeguard your certificate(for .p12 certificate). This is an optional action but we highly recommend you to have a password for security reasons.
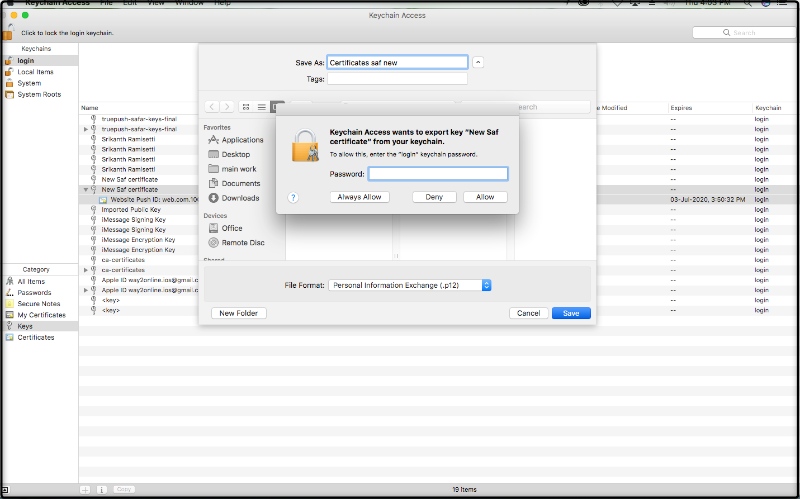
3.7.1 Next, it will prompt you for your system password twice.
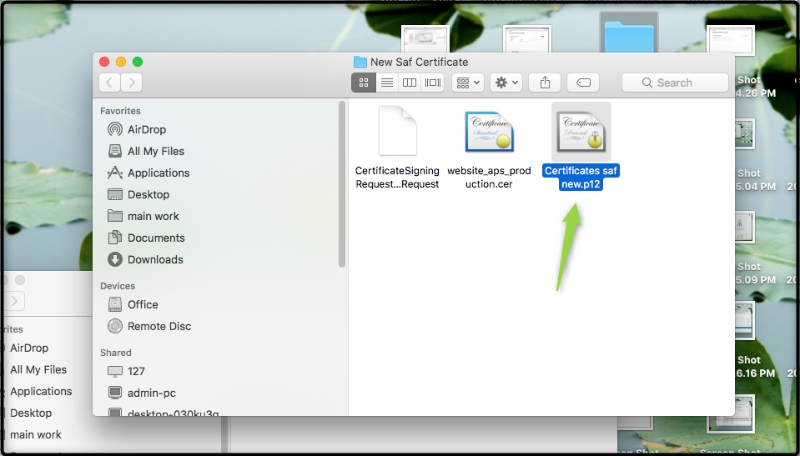
3.8 Once done, you should be now getting the final .p12 certificate to upload on the Truepush account.
STEP 4
Uploading The .p12 File(Web Push Certificate) On Truepush
4.1 Upload the .p12 certificate by clicking the choose file. If you have kept a password for the .p12 file while creating as suggested, please enter the password and click Save.

Boom! Your Safari Browser notification will start working.
PS: Please see that for safari, only 2-way notifications work. So when you select a default option to show in the opt-in type. For safari, we will have Bell Icon by default.
Also, read:
Add Custom Tag to HTTP
Way to Add Test User to your TruePush Dashboard
Follow us on our Social Media pages.
Facebook|LinkedIn|Twitter
Review us on TrustRadius.
Website: www.truepush.com
Email: help@truepush.com


